|
Getting your Trinity Audio player ready...
|
Once you are familiar with the basics of Zoho Sheets — like cells, rows, columns, and entering data — the next step is to explore the toolbar. The toolbar in Zoho Sheets is your command center for creating, formatting, analyzing, and managing spreadsheets efficiently.
Zoho Sheets is designed for MIS professionals, Data Analysts, students, and business users, so understanding the toolbar will save you time and make your workflow smoother.
Zoho Sheets has eight main menus in the toolbar: File, Edit, View, Insert, Format, Data, Review, Tools, and Help. Each menu contains multiple options that help you manage your spreadsheet like a pro. Let’s dive into each menu and its key functions.
1. File Menu
The File menu is where you manage your spreadsheets — from creating new files to exporting and sharing them.
Key Options:
- New Spreadsheet: Create a blank sheet from scratch.
- New from Template: Choose from pre-built templates for sales, HR, finance, inventory, etc.
- Open: Open an existing spreadsheet saved in Zoho or imported from your computer.
- Import: Import Excel, CSV, or Google Sheets files.
- Make a Copy: Duplicate the current spreadsheet for backup or editing.
- Save As / Download As: Save your spreadsheet in Excel, CSV, or PDF format.
- Email As Attachment: Send the file directly via email.
- Rename / Version: Change the sheet name and track versions.
- Share: Collaborate with team members by granting view, comment, or edit access.

Read More: Getting Started with Zoho Sheets
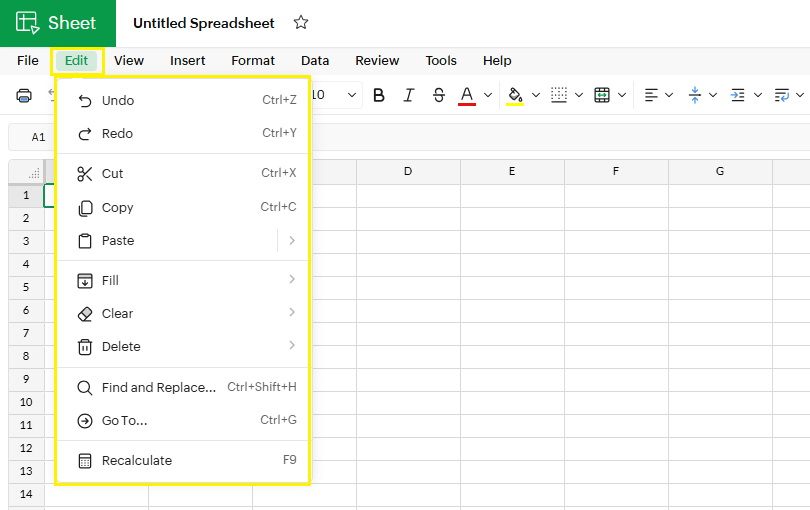
2. Edit Menu
The Edit menu is all about managing and modifying your data quickly.
Key Options:
- Undo / Redo: Quickly correct mistakes.
- Cut, Copy, Paste: Standard editing commands.
- Fill / Clear / Delete: Fill cells with data, clear content, or delete cells/rows/columns.
- Find and Replace: Search specific text or numbers and replace them.
- Go To: Jump to a specific cell.
- Recalculate: Refresh formulas manually if needed.
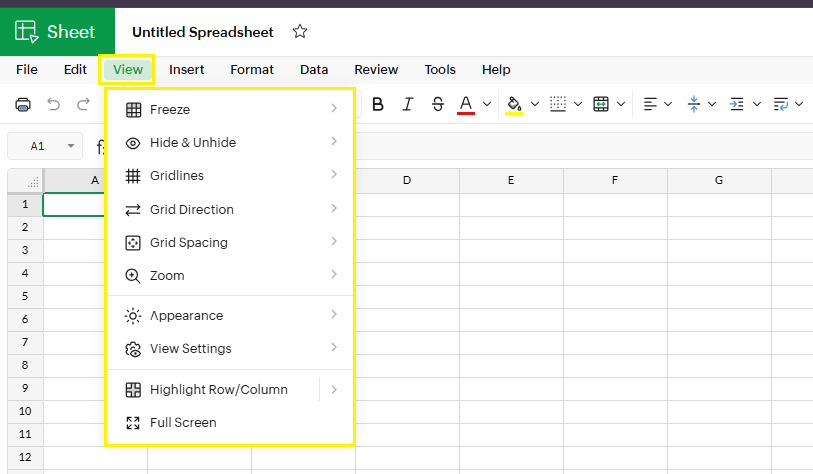
3. View Menu
The View menu helps you control what you see on the sheet and how the grid looks.
Key Options:
- Freeze: Keep specific rows or columns visible while scrolling.
- Hide / Unhide: Hide unnecessary rows, columns, or sheets.
- Gridlines / Grid Direction / Grid Spacing: Customize the cell grid appearance.
- Zoom: Adjust the view size of your spreadsheet.
- Appearance / View Settings: Switch between light/dark mode or compact layout.
- Highlight Row/Column: Highlight the active row or column for better navigation.
- Full Screen: Maximize the sheet area for focus.
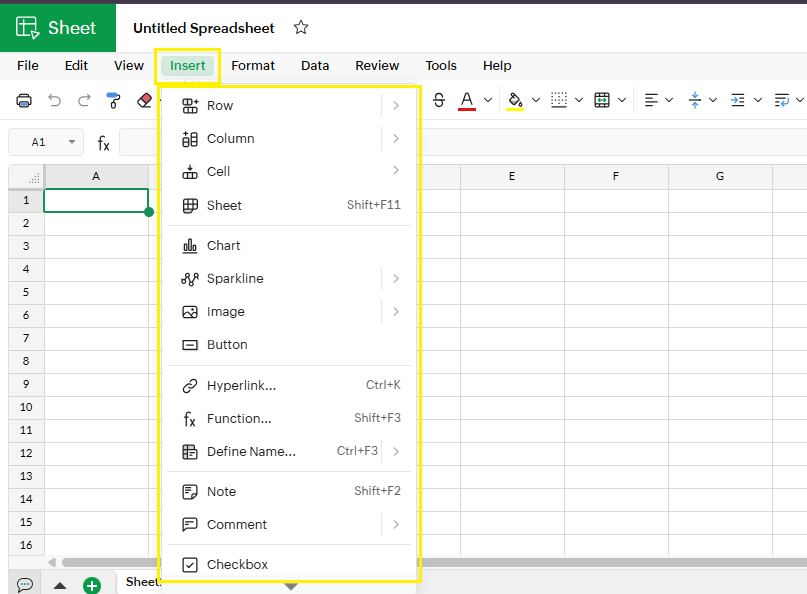
4. Insert Menu
The Insert menu is where you can add new elements to your sheet.
Key Options:
- Row / Column / Cell / Sheet: Insert additional rows, columns, cells, or a new sheet.
- Chart / Sparkline: Visualize your data easily.
- Image / Button / Hyperlink: Insert images, interactive buttons, or clickable links.
- Function / Define Name: Add formulas or define names for ranges.
- Note / Comment / Checkbox / Emoji: Add notes, leave comments, insert checkboxes, or emojis.
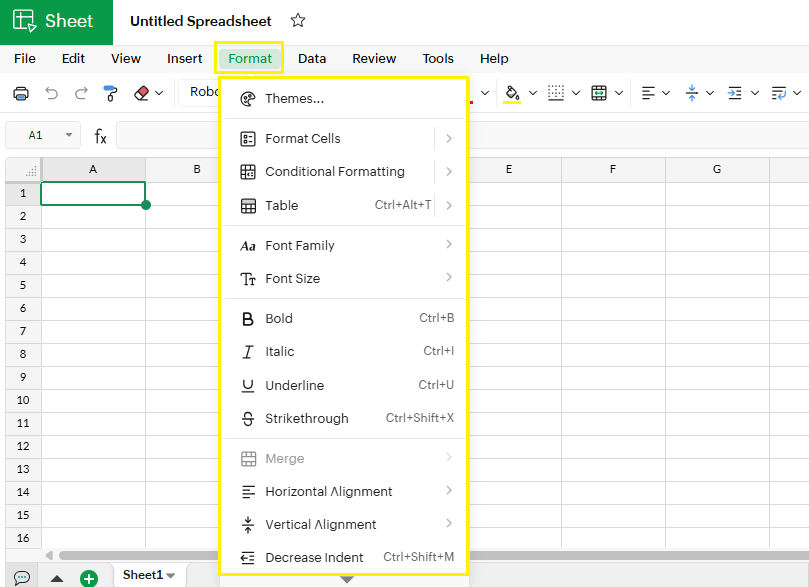
5. Format Menu
The Format menu is for styling your data and making it readable.
Key Options:
- Format Cells: Change number format, date, currency, percentage, etc.
- Conditional Formatting: Highlight cells automatically based on criteria.
- Table: Apply table formatting.
- Font Family / Size / Bold / Italic / Underline / Strikethrough: Standard text formatting.
- Merge Cells / Alignment / Indent: Merge cells, align text horizontally or vertically, and adjust indent.
- Wrap Text / Text Rotation: Make text visible within cells and rotate it if needed.
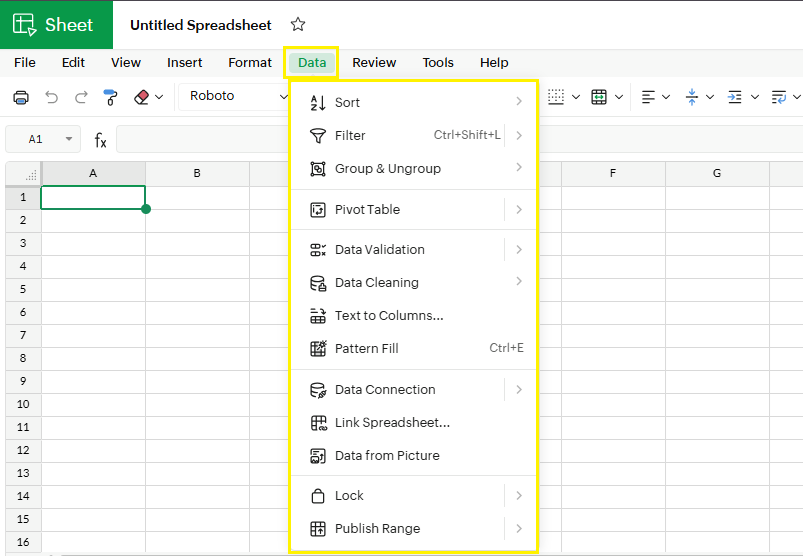
6. Data Menu
The Data menu is crucial for analyzing and managing large datasets.
Key Options:
- Sort / Filter: Organize data quickly.
- Group & Ungroup: Summarize data into sections.
- Pivot Table: Generate dynamic summaries.
- Data Validation: Restrict the type of data entered in cells.
- Data Cleaning: Remove duplicates, trim spaces, and fix inconsistencies.
- Text to Columns: Split data into multiple columns.
- Pattern Fill: Apply color patterns to cells.
- Data Connection / Link Spreadsheet / Data from Picture: Connect to external data sources or convert images to spreadsheets.
- Lock / Publish Range: Restrict editing or share specific ranges publicly.
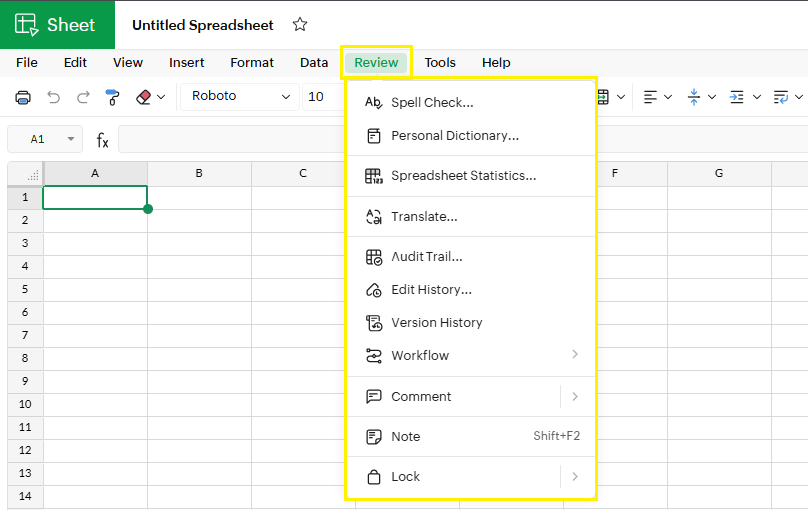
7. Review Menu
The Review menu is focused on checking, auditing, and collaborating.
Key Options:
- Spell Check / Personal Dictionary: Correct spelling errors and customize dictionary.
- Spreadsheet Statistics: Analyze your sheet with summary info.
- Translate: Translate text to another language.
- Audit Trail / Edit History / Version History: Track changes and edits.
- Workflow / Comment / Note / Lock: Manage approvals, leave comments, add notes, or lock sheets.
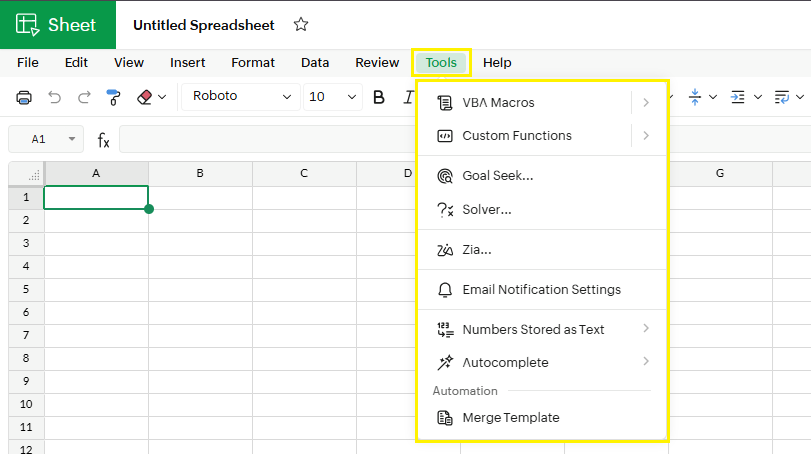
8. Tools Menu
The Tools menu is for automation and advanced features.
Key Options:
- VBA Macros / Custom Functions: Automate repetitive tasks.
- Goal Seek / Solver: Perform scenario analysis and optimization.
- Zia: Zoho’s AI assistant for insights and recommendations.
- Email Notification Settings: Alert users for changes.
- Numbers Stored as Text / Autocomplete / Merge Template: Additional productivity tools.
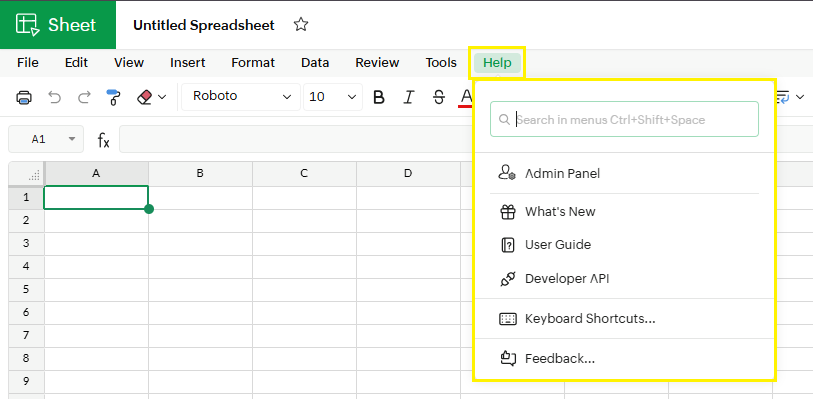
9. Help Menu
The Help menu provides resources and support.
Key Options:
- Admin Panel / What’s New / User Guide / Developer API / Keyboard Shortcuts / Feedback
This menu ensures you always have support, tutorials, and latest updates directly from Zoho.
Conclusion
Understanding the toolbar in Zoho Sheets is the first step to mastering this powerful online spreadsheet tool. From creating and formatting spreadsheets to analyzing data and collaborating with teams, each menu provides options that simplify your workflow.
By familiarizing yourself with the File, Edit, View, Insert, Format, Data, Review, Tools, and Help menus, you’ll work faster, smarter, and more confidently.
What’s Next?
In the next post, we’ll learn about the Formulas & Functions in Zoho Sheet