|
Getting your Trinity Audio player ready...
|
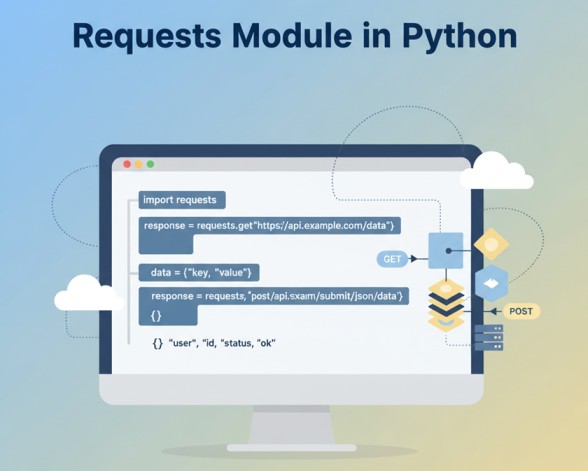
Learn GET, POST, JSON handling, API calls, parameters, headers, authentication & more.
The Requests module is one of the most powerful and most-used Python libraries for working with the internet. Whether you want to fetch weather data, search Google, call an API, read data from a server, or send information to a web application — Requests makes everything super easy and human-friendly.
If you are learning Python for Data Analysis, Automation, APIs, Web Scraping, MIS tasks, or backend development, then the Requests module is a must-learn skill.
Every concept is explained with simple examples, easy-to-understand language, and real-world use cases.
1. What is the Requests Module?
Requests is a Python library used to send HTTP requests to a website or API.
HTTP requests are of many types like:
- GET – to receive data
- POST – to send data
- PUT – to update data
- DELETE – to delete data
Python’s built-in modules (urllib, etc.) are complex. Requests makes everything simple.
Example of a GET request:
import requests

response = requests.get("https://smarttejas.com")
print(response.text)
That’s how simple it is!
2. Why Do We Use Requests?
Requests is very useful when:
✔ You want to call APIs
✔ You want to fetch data from a website
✔ You want to automate tasks
✔ You want to integrate two systems
✔ You want to download files
✔ You want to send JSON data
✔ You want to login or authenticate
In MIS/Data Analyst work, you may need:
- API to get daily sales
- API to get attendance data
- API to send reports
- API to fetch data from CRM or ERP
Requests makes these tasks extremely easy.
3. Installing Requests
Open your terminal or command prompt:
pip install requests
Then import it in Python:
import requests
4. Making Your First API Call (GET Request)
A GET request is used when you want to read or fetch data from a server or an API.
Example: Fetch data from a public API.
import requests

url = "https://jsonplaceholder.typicode.com/posts/1"
response = requests.get(url)

print(response.text)
Output will be the details of a blog post.
5. Understanding Response Object
response contains:
response.status_code→ status coderesponse.text→ response in text formatresponse.json()→ response in JSON formatresponse.headers→ metadata
Example:
print(response.status_code)
print(response.headers)
print(response.json())
6. Handling JSON Data
Most APIs return data in JSON format.
To convert JSON into Python dictionary:
data = response.json()
print(data['title'])
7. GET Request with Query Parameters
Many APIs allow filtering data using parameters.
Example:
url = "https://jsonplaceholder.typicode.com/posts"
params = {"userId": 1}

response = requests.get(url, params=params)

print(response.json())
This returns posts only from userId = 1.
8. Sending Headers (Such as API Keys)
Some APIs require an API key inside headers.
Example:
url = "https://api.example.com/data"

headers = {
    "Authorization": "Bearer YOUR_API_KEY",
    "Content-Type": "application/json"
}

response = requests.get(url, headers=headers)

print(response.json())
This is common in:
✔ Weather APIs
✔ Stock APIs
✔ CRM / ERP APIs
✔ Payment gateways
9. POST Request — Sending Data to Server
A POST request is used to send data to a server.
Example:
import requests

url = "https://jsonplaceholder.typicode.com/posts"

data = {
    "title": "Smart Tutorials",
    "body": "Learning Python Requests Module",
    "userId": 1
}

response = requests.post(url, data=data)

print(response.json())
10. POST Request with JSON Data
Most modern APIs use JSON data, not form-data.
Example:
url = "https://jsonplaceholder.typicode.com/posts"

payload = {
    "title": "Hello",
    "body": "This is JSON payload",
    "userId": 5
}

response = requests.post(url, json=payload)

print(response.json())
11. Difference: data= vs json=
| Parameter | Sends Data As | Used For |
|---|---|---|
data= | Form data (application/x-www-form-urlencoded) | Old APIs / HTML forms |
json= | JSON (application/json) | Modern REST APIs |
12. Sending Files with Requests (File Upload)
Example of uploading a file to server:
url = "https://api.example.com/upload"

file = {'file': open('report.pdf', 'rb')}

response = requests.post(url, files=file)

print(response.text)
Read More: File Handling in Python
13. Downloading Files using Requests
Download any image or pdf:
url = "https://example.com/sample.pdf"
response = requests.get(url)

with open("sample.pdf", "wb") as f:
    f.write(response.content)
14. Authentication in API (Basic Auth)
Some APIs use username/password authentication.
response = requests.get(
    "https://api.example.com/user",
    auth=("username", "password")
)

print(response.json())
15. Bearer Token Authentication
Common in modern APIs.
headers = {
    "Authorization": "Bearer YOUR_TOKEN"
}

response = requests.get(url, headers=headers)
16. Timeout in Requests
Always use timeout to avoid hanging programs.
requests.get(url, timeout=5)
If API delays, Python will stop after 5 seconds.
17. Error Handling & Status Codes
Common status codes:
| Code | Meaning |
|---|---|
| 200 | Success |
| 201 | Created |
| 400 | Bad Request |
| 401 | Unauthorized |
| 403 | Forbidden |
| 404 | Not Found |
| 500 | Server Error |
Example:
if response.status_code == 200:
    print("Success")
else:
    print("Error:", response.status_code)
18. Try-Except Block for Safe Requests
import requests

try:
    response = requests.get(url, timeout=10)
    response.raise_for_status()
    print(response.json())

except requests.exceptions.Timeout:
    print("Request timed out")

except requests.exceptions.HTTPError as e:
    print("HTTP error:", e)

except Exception as e:
    print("Other error:", e)
Read More: Error Handling in Python
19. Using Proxies
Sometimes you need to send request through a proxy.
proxies = {
    "http": "http://10.10.1.10:3128",
    "https": "http://10.10.1.10:1080",
}

response = requests.get(url, proxies=proxies)
20. Sessions — Maintain Login State
Useful for websites that require login.
session = requests.Session()

session.post("https://site.com/login", data={"user":"abc","pass":"123"})
response = session.get("https://site.com/dashboard")

print(response.text)
21. Real-Life MIS Example: Fetching Sales Data from API
import requests

url = "https://api.company.com/sales"

headers = {"Authorization": "Bearer ABC123"}

params = {"date": "2025-01-01"}

response = requests.get(url, headers=headers, params=params)

sales_data = response.json()

for item in sales_data:
    print(item['product'], item['quantity'])
22. Real-Life Example: Sending Daily Attendance to Server
url = "https://company.com/attendance"

data = {
    "employee_id": 102,
    "date": "2025-01-16",
    "status": "Present"
}

response = requests.post(url, json=data)

print(response.json())
23. Real-Life Example: Download Daily Report
url = "https://company.com/report/today"

response = requests.get(url)

with open("today_report.xlsx", "wb") as f:
    f.write(response.content)
24. Best Practices When Using Requests
✔ Always use timeout
✔ Use .json() to parse JSON
✔ Use try-except for stable code
✔ Don’t expose API keys
✔ Use sessions for multiple requests
✔ Cache API results if repeated
25. Summary
The Requests module is one of the most important modules for:
- API automation
- Data fetching
- Backend integration
- MIS reporting
- Python projects
You learned:
✔ GET, POST requests
✔ Sending headers
✔ Sending JSON
✔ File upload and download
✔ Authentication
✔ Error handling
✔ Real-life examples
This knowledge is enough to start working with any API confidently.
What’s Next?
In the next post, we’ll learn about the BeautifulSoup Module in Python